Assessing Your Current Bathroom and Setting a Budget
Before embarking on your bathroom renovation journey, it’s essential to take a close look at your current space. Start by making an honest assessment of your bathroom’s condition—consider the age of the fixtures, check for signs of damp or mould, and note any plumbing or ventilation issues. Identify what isn’t working for you, whether it’s outdated tiling, lack of storage, or inefficient layout. Next, think carefully about your practical needs: do you require a family-friendly space with a bath, or would a walk-in shower better suit your lifestyle? Once you’ve established your requirements, research typical renovation costs in the UK market. Prices can vary widely depending on region and specification, so consult local suppliers and tradespeople for accurate quotes. It’s wise to set a realistic budget that covers both labour and materials—remember that in the UK, fitting and installation often make up a significant portion of overall costs. Always include a contingency fund (usually 10-15%) to account for any unexpected discoveries behind the tiles or under the floorboards. By planning thoroughly at this stage, you’ll lay a solid foundation for a successful bathroom transformation.
2. Planning, Design, and Securing Permissions
Before swinging a hammer or calling in the trades, UK homeowners should begin their bathroom renovation journey with careful planning and design. The first step is to explore different layout options that optimise the often limited space found in British homes. Consider whether you want to keep the existing layout—saving on plumbing costs—or reconfigure the space for better flow and functionality.
Layout Options
| Layout Type | Best For | Considerations |
|---|---|---|
| Traditional (Bath & Basin Along One Wall) | Victorian terraces, smaller bathrooms | Efficient use of space, less costly plumbing |
| L-Shaped Layout | Family homes, larger spaces | Clear zones for bath/shower and WC, more privacy |
| Wet Room Conversion | Modern flats, accessibility needs | Requires specialist waterproofing, may need building regulations approval |
Fixtures and Fittings: British Preferences
Selecting fixtures and fittings is where personal style meets practicality. UK homeowners tend to favour classic white sanitaryware paired with chrome or brushed brass taps for a timeless look. Compact vanity units, heated towel rails (a must for chilly mornings), and water-saving dual-flush toilets are highly popular. Consider opting for energy-efficient LED lighting and extractor fans compliant with UK safety standards.
Popular Fixture Choices in the UK
| Fixture/Fitting | Description |
|---|---|
| Basin with Storage Unit | Maximises storage in smaller bathrooms |
| P-shaped Bath/Shower Combo | Saves space while offering both bathing and showering options |
| Thermostatic Mixer Shower | Consistent temperature control; safer for families |
Securing Permissions: Navigating UK Regulations
If your renovation involves moving plumbing, altering drainage, or making structural changes (such as removing walls or installing windows), it’s vital to check with your local council about planning permissions and building regulations approval. In England and Wales, most straightforward bathroom refits won’t require planning permission unless your property is listed or located in a conservation area. However, significant works—like converting a bedroom into a bathroom or installing a wet room—may trigger regulatory requirements.
Key Permissions Checklist
- Contact your local council if making major alterations or adding new windows/doors.
- Ensure all electrical work complies with Part P of the Building Regulations.
- If living in a flat or maisonette, check leasehold restrictions before starting work.
- For listed buildings, consult conservation officers regarding suitable materials and methods.
Proper planning at this stage will streamline your renovation timeline, reduce unexpected delays, and ensure your new bathroom meets both your vision and all legal requirements for UK homes.

3. Sourcing Materials and Hiring Tradespeople
One of the most crucial stages in any bathroom renovation is sourcing the right materials and engaging skilled tradespeople. For UK homeowners, it’s essential to ensure all fixtures, fittings, and finishes comply with British standards—this not only guarantees quality but also ensures your renovation meets local regulations. Start by researching reputable UK suppliers for key elements like tiles, sanitaryware, lighting, and ventilation units. Look for products that come with appropriate certifications such as CE marking or BSI Kitemark, which are widely recognised across the country.
Choosing Quality Suppliers
When selecting suppliers, prioritise those with solid reputations and positive reviews from other UK homeowners. Many established builders’ merchants and specialist showrooms offer expert advice tailored to British homes and can help you navigate choices from traditional Victorian-inspired designs to sleek contemporary lines. Don’t hesitate to visit showrooms in person—this allows you to see finishes up close and discuss durability, maintenance, and installation requirements directly with knowledgeable staff.
Engaging Trusted Tradespeople
A successful bathroom renovation hinges on the expertise of your trades team. In the UK, plumbers should be Gas Safe registered (if working with gas) and electricians must be Part P certified. Ask for references from previous clients and check online platforms such as Checkatrade or Trustmark for vetted professionals. It’s a good idea to gather multiple quotes—not just for cost comparison, but also to gauge communication skills and reliability.
Coordinating Timelines
Once your team is assembled, work closely with both suppliers and tradespeople to create a detailed schedule. Order materials well in advance—many bespoke items or special-order fixtures may have several weeks’ lead time, especially if sourced from premium UK brands. Coordinating delivery dates with your contractor’s timetable helps prevent costly delays and ensures your project progresses smoothly.
Final Tips
Remember: A considered approach at this stage sets the tone for your entire project. By investing time in sourcing quality materials and hiring accredited tradespeople, you’ll help ensure your new bathroom stands the test of time—both functionally and aesthetically—in line with UK standards.
4. Stripping Out and Preparing the Space
Once your plans are in place, it’s time to strip out the old bathroom—a stage that’s just as vital as the final fit-out. Begin by carefully removing existing fixtures such as baths, sinks, toilets, and any cabinetry. Pay attention to separating recyclable materials like metal taps, ceramic tiles, or glass shower screens. Many UK councils offer recycling schemes for building waste, so check local guidelines to ensure you’re disposing of materials responsibly.
Key Steps in Stripping Out
| Task | Best Practice | UK-Specific Guidance |
|---|---|---|
| Remove Fixtures & Fittings | Turn off water and electricity at mains before starting; use appropriate tools to avoid damaging pipes or wires. | Check for hidden isolation valves; consult a certified electrician for electrical disconnections. |
| Strip Tiles & Flooring | Wear protective gear; score grout lines before lifting tiles to minimise damage to walls and subfloor. | If asbestos is suspected (common in older UK homes), seek specialist removal. |
| Waste Segregation | Separate recyclables (metal, ceramics, plastics) from landfill waste. | Utilise council recycling centres; arrange a registered skip hire if needed. |
Tackling Underlying Issues
This is an ideal moment to address problems often concealed behind old fittings—think persistent damp patches, mould growth, or outdated plumbing. Inspect for leaks in pipework and signs of rot or crumbling plaster. In the UK climate, bathrooms are particularly prone to damp, so consider installing new damp-proofing membranes or improved ventilation if issues are found.
Preparation According to UK Regulations
All preparatory work should comply with British safety standards. For electrics, follow Part P of UK Building Regulations—meaning all electrical work must be carried out by a qualified professional. Walls and floors may need reboarding or levelling, especially if tiling is planned. At this stage:
- Test all wiring and pipework for safety and leaks.
- Install necessary backing boards for wall-hung units or heavy radiators.
- Apply moisture-resistant plasterboard where required.
- Ensure extraction fans meet Building Regulations for airflow rates.
Summary Table: Prep Checklist
| Task | Status Check |
|---|---|
| Pipes & Plumbing | No leaks; adequate pressure; up-to-date materials (e.g., copper/PVC) |
| Electrics | Mains off; safe isolation; RCD protection present |
| Damp Proofing | No signs of ingress; membranes installed if needed |
| Wall/Floor Leveling | Smooth and ready for new finishes |
This thorough approach sets a solid foundation for the next stages of your bathroom renovation, ensuring your new space is not only stylish but built to last within the context of UK homes and regulations.
5. Installation and Fitting
With the groundwork complete, it’s time for UK homeowners to move on to the crucial stage of installation and fitting. This phase is where your bathroom renovation begins to take tangible shape, as new components are carefully introduced into the space. It’s essential to approach this step methodically, ensuring every element meets both aesthetic aspirations and stringent UK standards.
Plumbing and Electrics: Safety First
Start by installing plumbing fixtures such as taps, showers, baths, and toilets. In the UK, all plumbing work must comply with the Water Supply (Water Fittings) Regulations 1999, focusing on water efficiency and preventing contamination. At this stage, a qualified plumber should be involved to ensure connections are secure and leak-free.
Next, address electrical fittings like lighting, extractor fans, and underfloor heating. It’s vital that all electrical work in bathrooms adheres to Part P of the Building Regulations—using a certified electrician guarantees compliance and keeps your household safe from hazards associated with water and electricity proximity.
Tiling: The Finishing Touch
Tiling not only contributes to the bathroom’s visual appeal but also protects surfaces from moisture. Lay tiles with precision, maintaining consistent grout lines and using appropriate adhesives for wet environments. Pay attention to British Standard BS EN 14411 for ceramic tiles to ensure durability and suitability for bathroom use.
Fitting Units and Fixtures
Once plumbing and tiling are complete, fit vanities, cabinets, mirrors, and shelving. Check that all units are levelled and securely anchored to walls—especially important in older UK homes where surfaces may not be perfectly true. Always use fixings suitable for your wall type (solid or stud) to guarantee longevity.
Throughout this phase, remain vigilant about British building regulations—not only for legal compliance but also for peace of mind and lasting quality. By paying particular attention to water efficiency standards and electrical safety protocols, you’re investing in a bathroom that is both stylish and safe for years to come.
6. Finishing Touches and Final Inspection
Adding Decorative Elements with British Flair
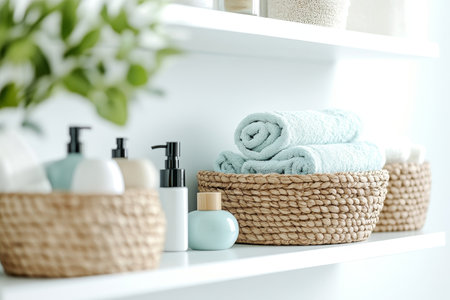
With the major construction work complete, its time to infuse your bathroom with personality by adding those quintessential finishing touches. In the UK, timeless design sensibilities often blend modern functionality with classic charm. Think about incorporating a statement mirror—perhaps with an ornate or Art Deco-inspired frame—to reflect both light and style. Accessories such as brass or matte black towel rails, elegant soap dishes, or traditional ceramic toothbrush holders can tie the room together. When it comes to paint, choose moisture-resistant finishes in muted tones like sage green, dove grey, or navy blue, which are perennial favourites in British homes.
Attention to Detail
The British eye for detail means even the smallest features matter. Select light fixtures that not only illuminate but also enhance the atmosphere—a frosted glass pendant or vintage wall sconces can create a warm, inviting glow typical of UK bathrooms. Consider adding finishing elements such as patterned floor tiles, tongue-and-groove panelling, or classic metro tiles for a touch of heritage.
Conducting a Thorough Walkthrough
Before you officially declare your renovation finished, carry out a meticulous walkthrough—commonly referred to as checking for “snags” in the UK. Inspect every corner for incomplete caulking, uneven grouting, loose fittings, or paint touch-ups that may be needed. Test all plumbing fixtures and electrics: ensure taps run smoothly, drains are clear, and lights and extractor fans function properly.
Certifications and Compliance
One crucial step for UK homeowners is verifying that all works comply with local regulations. For electrical installations in bathrooms—which are considered high-risk locations—ensure you have obtained the necessary Part P certification from a registered electrician. This not only guarantees safety but is also essential for future property sales and insurance requirements.
Signing Off Your Renovation
Once youve addressed any snags and confirmed all certifications are in hand, you can confidently sign off on your bathroom renovation project. Take a moment to appreciate how thoughtful design choices and careful compliance with UK standards have transformed your space into a stylish yet practical retreat.