Finding the Right Vintage Sideboard
Transforming a vintage sideboard into a centrepiece for your British home starts with the thrill of the hunt. The UK is brimming with opportunities to find characterful furniture, whether you’re wandering through local charity shops, perusing auction houses, or scrolling through online marketplaces like Gumtree, eBay, or Facebook Marketplace. Each source offers its own set of possibilities and quirks, so here are some tips to help you spot the perfect piece:
Charity Shops: Hidden Gems on the High Street
British charity shops often house overlooked treasures at reasonable prices. Visit regularly, as stock changes quickly and good pieces don’t linger. Don’t be afraid to ask staff if they expect any furniture deliveries soon—sometimes items are kept in storage or are due to arrive. Keep an open mind: a sideboard might look tired under poor lighting but can reveal stunning woodwork after a simple clean.
Auctions: Where Quality Meets Character
Auction houses, especially in smaller towns and villages, frequently offer sideboards from house clearances. Preview lots online or attend viewings to inspect items for hidden damage or signs of woodworm. Remember, bidding can be competitive; set yourself a budget and stick to it. Auctions are also ideal for spotting unique styles not commonly seen elsewhere.
Online Marketplaces: Convenience and Choice
If you prefer shopping from home, platforms like eBay and Facebook Marketplace provide plenty of options across the UK. Use filters to narrow by location and style—think mid-century modern, Art Deco, or Edwardian. Request additional photos if listings are sparse and always check measurements carefully to ensure the sideboard will fit your intended space.
What to Look For: Structure and Style
No matter where you search, pay close attention to the structure: check that drawers slide smoothly, doors align well, and legs are sturdy. Avoid pieces with extensive water damage or warped wood unless you’re prepared for a major project. In terms of style, consider what complements your home’s character—classic British oak for period properties or sleek lines for a more contemporary flat.
Tip: Transport Logistics
Don’t forget about how you’ll get your new-old sideboard home! Some sellers offer delivery for a fee; otherwise, hiring a ‘man with a van’ is a common solution in the UK. Plan ahead, especially for heavy or bulky items.
Sourcing a vintage sideboard is as much about patience and persistence as it is about luck—embrace the journey and let your instincts (and tape measure) guide you.
2. Preparing Your Workspace and Materials
Before you dive into transforming your vintage sideboard, setting up an efficient and tidy workspace is essential—especially in a British home where space can often be at a premium. Choose a well-ventilated area, such as a garage, shed, or even a kitchen with windows open wide. Lay down dust sheets or old newspapers to protect floors and surfaces from paint splashes and wood dust. If you’re working indoors, ensure pets and children are kept safely away from the project area.
Essential Tools and Materials Checklist
Having the right tools to hand will make your refurbishment go smoothly. Here’s a handy table to help you assemble everything before you start:
| Tool/Material | Purpose |
|---|---|
| Screwdrivers (flat-head & Phillips) | Removing hardware & fittings |
| Sandpaper (various grits) | Smoothing surfaces for painting or staining |
| Paintbrushes & rollers | Applying primer and paint |
| Primer & paint/wood stain | Refinishing the sideboard’s surface |
| Masking tape | Protecting areas you don’t want painted |
| Damp cloths | Cleaning dust and residue |
| PPE (gloves, goggles, mask) | Personal safety during sanding & painting |
British Home Considerations
If you’re in a period property or dealing with delicate wooden floors, use felt pads under furniture legs to avoid scratches. For those living in flats, keep noise levels low by opting for manual sanding blocks rather than electric sanders during unsociable hours.
Safety First
Always wear protective gloves when handling old furniture—it may have sharp edges or splinters. Goggles and masks are crucial while sanding or painting to prevent inhalation of dust or fumes. Ensure good ventilation throughout the process, particularly with oil-based products common in UK DIY shops.
3. Stripping and Sanding Back the Years
Once you’ve cleared and prepped your vintage sideboard, it’s time to remove those old finishes that have dulled its original charm. In Britain, where many homes feature a mix of hardwoods like oak and softwoods such as pine, it’s essential to choose methods that are both effective and gentle on your furniture. Start by selecting an eco-friendly paint or varnish remover—look for water-based formulas available at most DIY shops across the UK. Apply the stripper with a brush, following the grain, and allow it to work according to the manufacturer’s instructions. Once the finish begins to lift, use a plastic scraper to gently remove residue; avoid metal tools which can gouge softer British woods.
After stripping, move on to sanding. Begin with a medium-grit sandpaper (around 120 grit) attached to a sanding block or an orbital sander for larger flat surfaces. Always sand in the direction of the wood grain—this is especially important for softer British timbers prone to scratching. Progress to finer grits (180–220) for a smooth finish, paying special attention to corners and detailed mouldings where old finishes tend to linger. For intricate carvings, use flexible sanding pads or fine wire wool. Remember to wear a dust mask and ventilate your workspace well—old finishes may contain lead or other nasties common in older British furniture.
The goal here isn’t to erase all signs of age but rather to create a clean, receptive surface for your next steps. Take your time, check your progress frequently, and don’t rush: careful stripping and sanding lay the foundation for transforming your vintage sideboard into something truly stunning for your British home.
4. Repairing and Restoring Integrity
Now that your vintage sideboard is stripped back to its bare bones, it’s time to address any structural issues that might undermine its longevity or charm. This step is all about restoring integrity—mending wobbly joints, filling unsightly chips, and updating hardware with authentic British options.
Fixing Wobbly Joints
Loose joints are a common issue in older furniture. Start by gently testing each joint for movement. If you find any wobbling, carefully disassemble the joint if possible. Clean away old glue with a soft brush and sandpaper, then re-glue using a high-quality wood adhesive such as Evo-Stik Wood Adhesive, widely available at B&Q or Wickes. Clamp the joint firmly and allow it to cure for at least 24 hours.
Filling Chips and Surface Imperfections
Chips and gouges can detract from the overall finish. For an authentically British restoration, opt for wood fillers like Ronseal High Performance Wood Filler or Liberon Wax Filler Sticks, both of which are easily sourced from UK suppliers. Select a shade that matches your sideboard’s wood type as closely as possible. Apply filler with a putty knife, let it dry thoroughly, then sand smooth for an even surface.
Replacing Hardware: British Supplier Options
Original handles and hinges may be missing or beyond repair. For a truly British feel, choose replacement hardware from reputable local suppliers. Here’s a quick comparison of some popular options:
| Supplier | Types Available | Notable Features |
|---|---|---|
| Yester Home | Cast iron & brass handles | Period-authentic designs, made in the UK |
| The Door Knocker Company | Ceramic & metal knobs | Bespoke finishes, traditional styles |
| Suffolk Latch Company | Latches & hinges | Hand-forged, rustic appeal |
| B&Q/Wickes | Modern replacements | Budget-friendly, easy access nationwide |
Select hardware that complements your sideboard’s era and character—brass cup handles for mid-century pieces or ceramic knobs for Edwardian charm. Always check screw hole alignment before installation to avoid unnecessary drilling.
Top Tip:
If you’re keen on authenticity, scour local reclamation yards or antique shops for original fittings; sometimes all your piece needs is a bit of patience and a sharp eye.
Summary Checklist:
- Tighten or reglue wobbly joints with proper adhesives
- Fill chips with UK-sourced fillers matched to your wood tone
- Select era-appropriate hardware from trusted British suppliers
- Always test fit new components before permanent fixing
This careful attention to detail ensures your restored sideboard will stand sturdy—and look splendid—in any British home for years to come.
5. Choosing a Colour Palette: Classic or Contemporary
One of the most enjoyable stages in transforming a vintage sideboard is selecting the right colour palette. In British homes, both classic and contemporary finishes have their place, and your choice can dramatically influence the overall atmosphere of your space. Begin by considering the existing decor in your home. If you’re drawn to the charm of traditional British interiors, opt for heritage shades such as deep navy, rich forest green, or timeless dove grey. These colours are reminiscent of period properties and country cottages, lending an air of sophistication and warmth. For those who favour a modern twist, don’t be afraid to experiment with bold hues. Jewel tones like emerald, mustard yellow, or even striking teal can bring a vintage piece bang up to date while still feeling at home within UK design sensibilities.
Inspiration from Iconic British Interiors
Look to some of Britain’s most loved interior styles for inspiration. The understated elegance of Farrow & Ball’s muted palettes or Little Greene’s historic shades often feature in Georgian or Victorian settings. Alternatively, take cues from more eclectic London flats where vibrant accent colours add personality without overwhelming the room.
Choosing Finishes: Paint or Wood?
If you want to retain the character of the wood grain, consider using waxes or stains that enhance rather than mask its natural beauty. Limed oak or deep walnut finishes are perennially popular in British homes for their ability to blend with both old and new decor schemes. However, painted finishes offer an opportunity to inject colour and creativity—just ensure you use high-quality paints designed specifically for furniture for lasting results.
Tips for Harmonising with Your Space
Always test a small area before committing to a full application, as lighting can greatly affect how colours appear throughout the day. Think about layering different tones—perhaps a contrasting interior shade for drawers—to add subtle interest. Ultimately, whether you choose a classic finish or something more contemporary, ensure your sideboard reflects your personal taste while sitting comfortably within your British home’s unique style.
6. Finishing Touches and Styling
Infusing British Character with Hardware
The right hardware can truly elevate your vintage sideboard and bring out that quintessential British charm. Consider swapping out old handles and knobs for classic brass cup pulls or ceramic knobs adorned with floral motifs, reminiscent of a countryside cottage. For a more refined look, opt for polished chrome or glass handles—these echo the understated elegance found in many Georgian and Victorian homes across the UK. Antique shops or reclamation yards are treasure troves for finding unique, period-appropriate hardware that will make your piece stand out.
Decorative Details: Subtle Yet Striking
Small decorative details go a long way in personalising your sideboard. Add a touch of British heritage by lining the drawers with William Morris-inspired wallpaper or fabric. You might also consider stencilling subtle botanical patterns onto the panels, or adding delicate beading along the edges. These thoughtful touches not only honour the piece’s vintage roots but also weave in a story unique to your home.
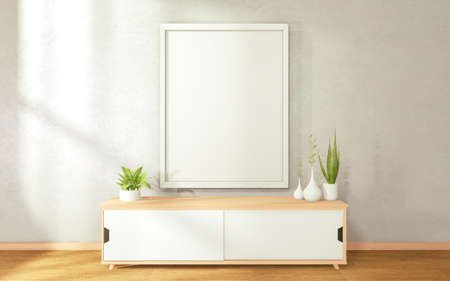
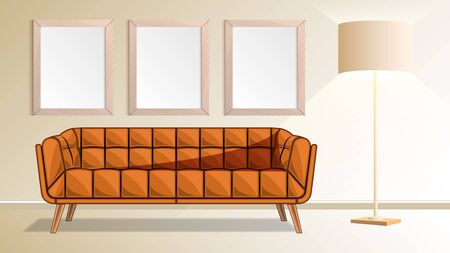
Styling Your Sideboard in a British Home
Once your transformation is complete, it’s time to style the sideboard so it feels right at home in your British interior. In the hallway, top it with a statement lamp, a bowl for keys, and a vase of freshly cut garden flowers—think peonies or bluebells for an authentic touch. If placed in the dining room, display fine bone china, vintage glassware, or a collection of cookbooks. For sitting rooms, style with framed family photos in classic wooden frames, stacked hardback novels, and perhaps a quirky antique clock from a local market.
Final Flourishes
Don’t forget to add those little flourishes that make all the difference: a tartan runner draped across the top; a scented candle evoking English gardens; or even a small tray of loose-leaf tea ready for guests. With these finishing touches, your sideboard will not only serve as a functional piece but also as a beautiful focal point brimming with British personality.